Pages

Monday, January 30, 2012

Chocolate Covered Strawberries

Chocolate covered strawberries are super simple to make, yet they are oh, so expensive to buy, so why not make your own.


Ingredients

  • 16 ounces milk chocolate chips
  • 2 tablespoons shortening or olive oil or another oil (about 1 Tbsp per 1 1/2 cups chips)
  • 1 pound fresh strawberries with leaves
  • toothpicks
  • styrofoam or parchment paper or lightly oiled plate for cooling berries
    double broiler to melt the chocolate (I simply placed a stainless steel bowl over top a boiling water bath in my soup pot.)

Toppings 
ideasHere's where the fun comes in..
raw, unsweetened shredded coconut
dried goji berries
crushed cinnamon graham crackers
chopped raw pecans
chopped nuts (wide variety of options - brazil, walnuts, macadamia nuts and more)

Directions

1. Set up your topping station with shallow bowls filled with different toppings. Wash and dry your berries. Make sure the berries are totally dry - so the chocolate is able to stick.

2. Pour your chips into a stainless steel bowl. Add about 1 Tbsp of oil. Start boiling a shallow pot of water on the stove. Place your chocolate bowl over the steam and allow the chips to melt slowly. Stir gently. When your chocolate is melted you will want to work quickly.
dark choco chips..
3. Easy! Insert toothpicks into the tops of the strawberries and dip your strawberries into the chocolate then into the toppings or without. Lay them on a flat platter to cool while you continue dipping. Parchment paper or a lightly oiled surface works well for this or turn the strawberries upside down and insert the toothpick into styrofoam for the chocolate to cool.


4. Chill your berries in the fridge for at least an hour. Remove berries from fridge when ready to serve! Enjoy and have a Happy Vegan Valentine's Day!!!


Tropical Cheese Cake


Cách làm: (Chuẩn bị 1 khuôn đế rời 8-icnh (20cm), lót giấy nến vào đáy khuôn)
     * Đế bánh:
- 145g bánh bích quy
- 25g dừa vụn sấy
- 90g bơ lạt (đun tan chảy = microware)

- Cho bánh bích quy vào máy xay (food processor), xay nhuyễn. Sau đó cho dừa sấy + bơ chảy vào xay tiếp cho hỗn hợp mix thật đều nhau là ok.
- Đổ hỗn hợp trên vào khuôn – dàn đều & nén chặt hh xuống đáy khuôn. Sau đó, cho khuôn vào tủ lạnh.

* Hỗn hợp cheesecake:
- 125 ml nước cam tươi (mua cam Mỹ sẽ thơm ngon hơn)
- 5 tsp bột gelatine
- 350g cream cheese (để bên ngoài cho mềm, hết lạnh)
- 75g~90g đường
- 2 tbsp nước cốt chanh vàng
- 1 lon xoài hộp 14oz (nếu dùng xoài tươi thì 2 trái)
- 1 lon thơm hộp 14oz (loại unsweetened crushed)
- 315 ml whipping cream
- Cắt xoài + thơm ra thành những hạt lựu nhỏ (nếu mua loại miếng lớn).  

- Cho nước cam tươi vào chén sành -or- thuỷ tinh, từ từ rải đều bột gelatine vào từng lớp 1 để cho gelatine ngấm nước cam, sau đó để yên vài phút cho gelatin nở. Đặt nồi nước nhỏ lên bếp nấu sôi (mực nước khoảng 1¼-icnh) rồi tắt lửa => đặt nguyên chén gelatine vào nồi (như chưng cách thuỷ) rồi khuấy đều cho gelatin tan chảy & đổi trong là được. Lấy chén gelatine ra để nguội.

- Cho Cream cheese + đường vào tô lớn, dùng máy đánh trứng đánh khoảng 3 phút cho hỗn hợp mịn mượt => cho nước cốt chanh vào đánh chung cho đều.

- Cho xoài + thơm (đã cắt hạt lựu nhỏ) vào tô hh, dùng phới trộn nhẹ cho đều lên => rồi cho phần nước gelatine vào trộn chung cho hỗn hợp thật mix đều là ok. Để sang 1 bên.
- Đổ whipping cream vào tô khác (nhớ để whipping cream trong tủ lạnh cho thật lạnh) => đánh cho bông lên.

- Trộn whipping cream (đã được đánh bông) vào tô hh cream cheese cho đều. Sau đó, đổ tất cả hỗn hợp vào khuôn đế bánh (đã chuẩn bị sẵn) => dàn đều mặt rồi dùng tấm nylông (Plastic food wrap) bịt kín lại => cho vào tủ lạnh để qua đêm cho hỗn hợp đông lại.

- Lấy bánh ra khỏi khuôn => trang trí trái cây như ý muốn => quét apple jelly lên trái cây là xong.
     * Trang trí:
- Trái cây (loại tuỳ ý)
- Apple jelly (dùng để phết trái cây, giữ tươi & tạo bóng)

Sunday, January 29, 2012

Bánh mì ổ rổng ruột


A. Cách làm bột chua (Starter):
150 gam bột bánh mì (1 1/5 cups bread flour)
1g muối (1/8 tsp salt)
1g men (1/8 tsp instant yeast)
150 cc nước lọc (không cần ấm) ( a little less than 3/4 cup warm water)

  • Trộn bột, muối, men cho thật đều, sau đó cho nước lọc trộn đều rồ đậy kín. Để nhiệt độ phòng 4h, sau đó cho vô tủ lạnh để qua đêm. (Bột chua này làm đưộc 2 mẻ bánh mì). 
  • Mix salt, yeast, flour until blended, then add warm water and stir well. Cover and let it set in room temperature for 4 hours, then put in the fridge over night).


B. Trộn bột (Dough): 

-175 gam bột mì dai (1 3/4 cups bread flour)
-5g muối (1 tsp salt)
-2g men nâu (1/2 tsp instant yeast)

-1 chút Vitamin C dạng nước hoăc dùng viên Vitamin tán nhuyễn cho 1 tí nước hòa tan ( kg có cũng kg sao). (1 tsp Vitamin C syrup or tablet, mash into powder and mix it with little bit water until dissolved (optional)
-pha để sẳn 1 ít nước muối để xịt mặt bánh trước khi nướng. (prepare  little bit of salt water to spray on the bread before bake)

-2g Oriental Malt Powder) hoăc dùng Malt syrup ( nếu dùng syrup thì hoà tan trong phần 90 cc nước ghi bên trên) công dụng của thành phần này là làm cho bánh nở mềm và giúp cho vỏ bánh giòn . (1/2 Oriental Malt Powder or Malt syrup (if use syrup mix it with a little bit over 1/3 cup warm water above). This part will help the inside of the bread soft and crunchy crust. 
-90 cc nước lọc ( không cần ấm) (a little bit over 1/3 cup warm water) I add this in, the internal turn really brown, not really like it. I use the Ovaltine Malt Powder, not sure it's the right one. So I skip it.

Cách thực hiện (Direction):


  • 175g bot mì + muối+men nâu+ bột Malt : dùng phới đánh trứng trộn thật đều,sau đó cho 90 cc nước vô ,cho 1/2 bột chua ( A) vô trộn chung rùi cho ra bàn nhồi và đập trong 2 phút ( ở giai đoạn này mới đầu hổn bợp bột dính tay nhưng kg cần cho bột khô vô,cứ vừa nhồi vừa đập, nếu dính quá thì dùng miếng nhựa mỏng để cạo phần bột dính rùi tiếp tục đập và nhồi đến khi thấy bột bắt đầu nở và ít dính tay hơn thì kg cần đập bột nữa mà chỉ nhồi tay thêm 7p hoac cho vô máy KA nhồi ( cách nhồi bột tay làm bánh mì ổ có thể search trên Gơgle tham khảo cho dễ hiều và dễ hình dung hơn)
  • Cho bột vô ủ chỗ ấm hoăc ủ lò vi sóng 35 độ 60 p.
  • (In the Kitchen Aid use the dough hook add 1 3/4 cups bread flour, 1 tsp salt, 1/2 tsp instant yeast, and 1/2 Oriental Malt Powder stir until blended. Then add 1/3 cup warm water and 1/2 starter with number 2 for 15 - 20 minutes.
  • Let it rest in the warm place or in the oven with 95 degreed in Fahrenheit for 1 hour.

2) Chia bột (Dividing):

  • Bột sau khi ủ xong cho bàn (đè nhẹ cho thoát bớt khí) chia làm 2 phần
  • Gập bột theo hướng 90 độ ( gập 2 lần chứ kg vo tròn)
  • Để bột nghĩ 15p (nhớ đậy khăn ẩm lên trên).
  • (After the dough rested for 1 hour, take it out and place on the counter or table (do not press the dough to let the air out) divided the dough in 2 
  • Fold in 90 degreed (fold 2 times, not make it round). 
  • Let the dough rest another 15 minutes (remember to cover with a warm cloth)
3) Tạo hình (Forming):

  • Tạo hình xong cho vô lò ủ ( hoặc để nới ấm) 35 độ 60 p.
  • (Make shape then rest for 1 hour in 95F) .

4) Nướng bánh (Bake):

  • Bật lò 230 độ ~250 độ C ( tuỳ lò mạnh yếu) chỉnh 13-15p
  • Rạch bánh mì
  • Quét một lớp trư´ng lên bánh mì
  • Xịt ít nước muối lên trên mặt bánh
  • Khi lò báo đủ độ nóng thì cho khay bánh vô nướng.
  • (Preheat the oven and set for 13-15p)
  • (Make score the loaves along the top surface with a razor blade or other very sharp blade before bake)
  • (Brush a eggs mixture or melted butter on the dough)
  • (Spray salt water on the dough before bake)


Theo ct chua chi CindyPhuong

Saturday, January 28, 2012

Chinese Cocktail Buns or Coconut Buns 1


"These cocktail buns are like the ones you get at Chinese bakeries. They are filled with a creamy coconut filling. Yum!"


Ingredients

  • For Dough:
  • 1/3 cup white sugar or brown sugar
  • 1 cup milk
  • 1/4 cup softened butter
  • 2 teaspoons instand yeast
  • 2 1/2 cups all-purpose flour
  • 2 tsps. of wheat gluten
  • 2 egg, beaten
  • 1/4 tsp salt 
  • 1 cup all-purpose flour, or more if needed

  • 1 tablespoon sesame seeds, for garnish (optional)


Directions

1) Place 1/3 cup sugar and 1 cup milk in a small saucepan, and stir until the sugar is dissolved. Add 1/4 cup softened butter, and gently warm the mixture until the butter melts and the mixture is warm but not hot (no warmer than about 100 degrees F (40 degrees C). 

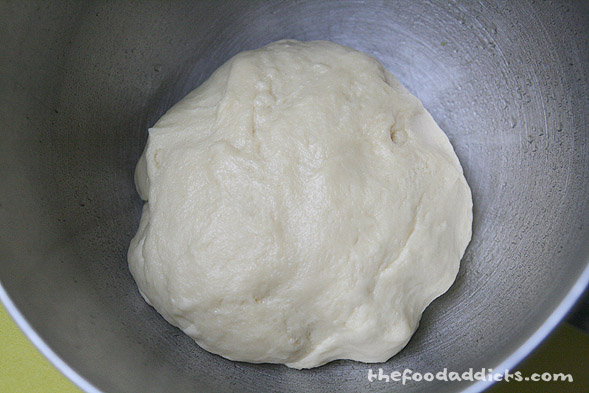
2) In a large bowl, stir together the 2 tsps yeast, 2 1/2 cups flour and 1/4 tsp salt until well blended, and pour the milk mixture (from 1) into the flour-yeast mixture. Stir in 2 beaten egg, and mix until the mixture forms a sticky, wet dough. Form the dough into a round ball, place into an oiled bowl, and turn the dough around in the bowl a few times to coat with oil. Cover the bowl with a wet warm cloth, and allow dough to rise in a warm place until doubled, about 1 hour.


  • For Filling:
  • 3 tbsp softened butter
  • 1 cup finely grated fresh coconut (or frozen unsweetened coconut flakes)
  • 5 Tbsp honey (or brown sugar)
  • 1 egg yolk 
    • 1/4 cup nonfat dry milk powder (optional)

  •  
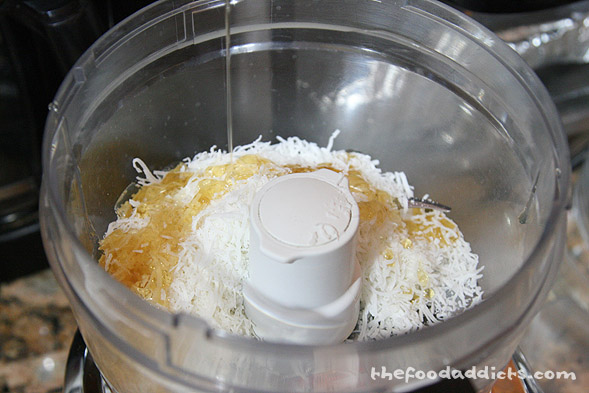
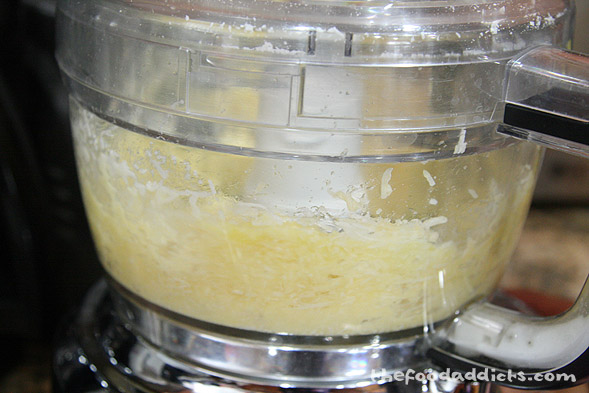
  • While the dough is rising, prepare the coconut filling by adding 1 cup coconut flakes, 3 tbsp sorted butter, 5 tbsp honey, and 1 egg yolk into a food processor. Then add 1/4 cup nonfat dry milk powder in the coconut, and stir until the mixture is smooth and well blended. Set the filling aside.


Making the party:

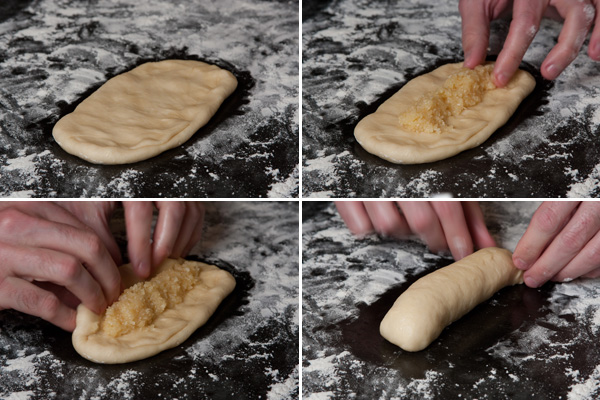
1) Working on a floured surface, punch down the dough, and cut into 2 equal pieces. Cut each piece into 8 equal-sized pieces (16 pieces total). Form each piece into an oblong bun, and flatten the bun with a floured rolling pin. Scoop up about 1 tbsp of filling with a spoon, and place in the center of a bun. Pull and pinch the edges of the dough together to enclose the filling in the bun. Repeat with all dough pieces, and place the filled buns, seam sides down, onto the prepared baking sheets. Cover the buns with a cloth, and allow to rise in a warm place 1 hour.


2) Preheat an oven to 375 degrees F (190 degrees C). Line baking sheets with parchment paper.

3) For a glossy coating, beat 1 egg and 1 tbsp water a bowl, and brush each bun with a little 
beaten egg. Sprinkle each bun with a few sesame seeds.


5) Bake in the preheated oven until the buns are golden brown, 10 to 15 minutes. Allow to cool 
before serving.


  • Honey wash: Combine honey and hot water in separate small cup. Brush over warm baked buns. Serve warm.

  • Cook's Notes

  • For bread to rise, warm oven to 150 degrees F (70 degrees C). When oven is warm, turn it off and place the covered dough into the oven for 1 hour to rise.

Bánh Bông Lan (Gato HongKong)


Nguyên liệu: cho khuôn nhôm tròn đáy liền 16cm - bánh cao được 5cm
(A) 2 lòng đỏ + 4 1/2tbsp cake flour + 2.5tbsp bột bắp + 3tbsp đường xay + 1 1/2 tbsp dầu + 1 1/2 tbsp sữa + chút vani
(B) 2 lòng trắng + 1/8 tsp cream of tartar (có thể thay bằng chút muối + nước cốt chanh) + 3tbsp đường xay.
Optional: Nho khô, hạt điều (raising, nuts)


Cách làm: 
Dùng phới đánh tan lòng đỏ, tiếp theo cho đường vào đánh tan rồi cho tiếp các chất lỏng và vani vào đánh đều, sau cùng cho bột vào trộn thật đều.

Lòng trắng trứng + bột tartar đánh cho nổi bọt rồi cho từ từ đường vào đánh đến khi được hỗn hợp bông cứng nhưng bóng mịn và đàn hồi (không đánh cứng quá hh sẽ bị khô)

Cho 1/3 phần lòng trắng vào hh lòng đỏ và dùng phới quậy mạnh cho tan đều và hh lỏng ra bớt, sau đó cho từ từ phần lòng trắng vào và dùng cây trộn bột trộn nhẹ nhàng từ dưới lên sao cho hỗn hợp quyện đều nhau mà vẫn bông xốp (không làm mạnh tay hh dễ bị xẹp hay chảy ra làm cho bánh bị chai xẹp)

Khuôn nhôm đáy liền không chống dính lót một lớp giấy ở đáy, ngoài ra không bôi trét gì cả, cho bột vào khuôn rồi cho vào lò đã đạt nhiệt độ 310F (khoảng 155C) nướng khoảng 30 phút là bánh chín. Nếu trường hợp dùng khuôn đáy rời thì không phải lót gì cả, cũng không bôi trét gì, chỉ việc đổ thẳng bột vào khuôn rồi nướng thôi.

Bánh chín lấy ra khỏi lò ngay rồi úp ngược xuống hai cái chén để bánh nguội và không bị xẹp. Sau đó lật khuôn lại và dùng dao tách thành bánh để lấy bánh ra.


Theo CT của chị Cá Vàng